
 Deutsch
 Русский
 Español
 Français
No products in the cart.

Eyelash Knowledge & Education, Lash Extension Guides
Eyelash Extension Application: 7 Essential Steps
10
Jul
Jul
Eyelash extension application is the professional process of attaching individual extensions or lash fans to suitable natural lashes. A clean, comfortable and long-lasting result depends on careful preparation, correct product selection, precise isolation and controlled adhesive use.
For lash artists, salons, training academies and lash brands, understanding the complete eyelash extension application process also makes it easier to evaluate product quality. As an eyelash manufacturer and wholesale supplier, we focus on producing consistent fibers, neat bases and stable curls for professional lash services.
What Is Eyelash Extension Application?
Eyelash extension application involves bonding one extension or fan to one isolated natural lash. The purpose is to add length, curl, definition or volume while maintaining a balanced weight.
The finished result can be affected by:
- The condition of the client’s natural lashes
- Extension length, curl and thickness
- Lash mapping
- Isolation technique
- Adhesive quantity
- Temperature and humidity
- Product consistency
- Client aftercare
A successful eyelash extension application should create an even lash line, feel comfortable and suit the strength of the client’s own lashes.
Products Needed for Eyelash Extension Application
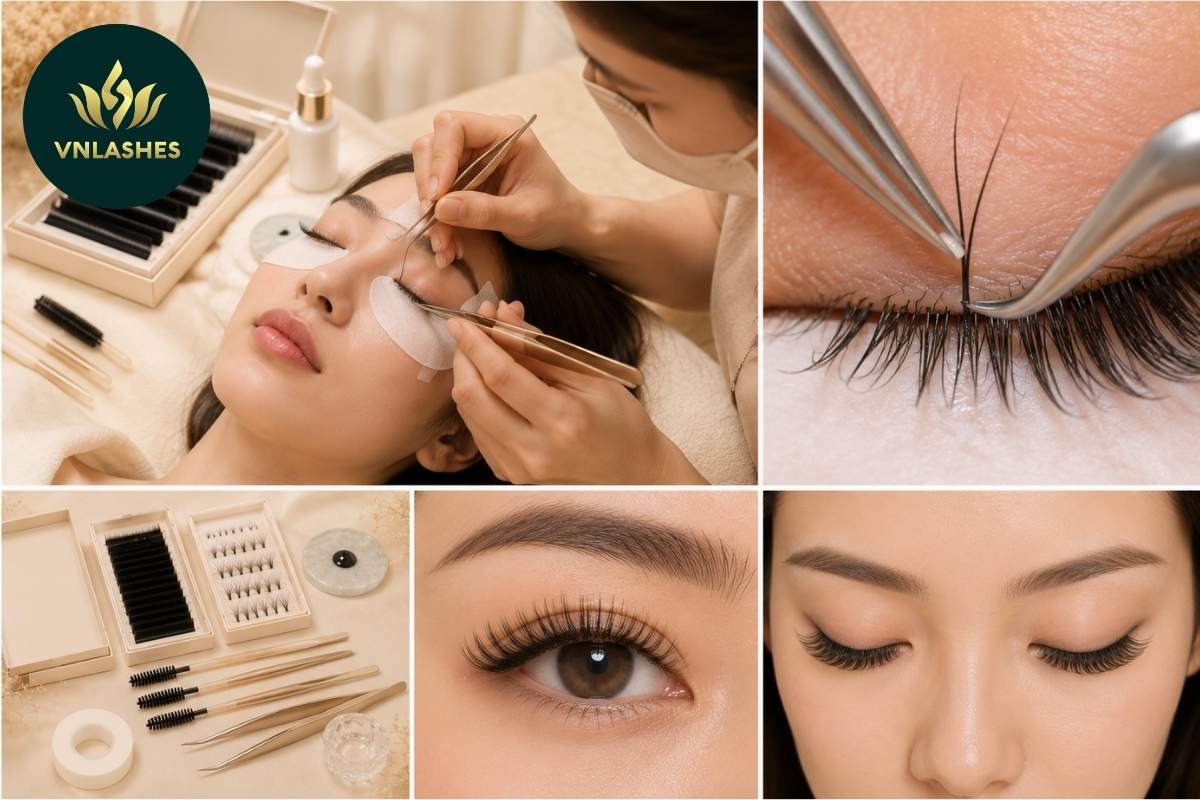
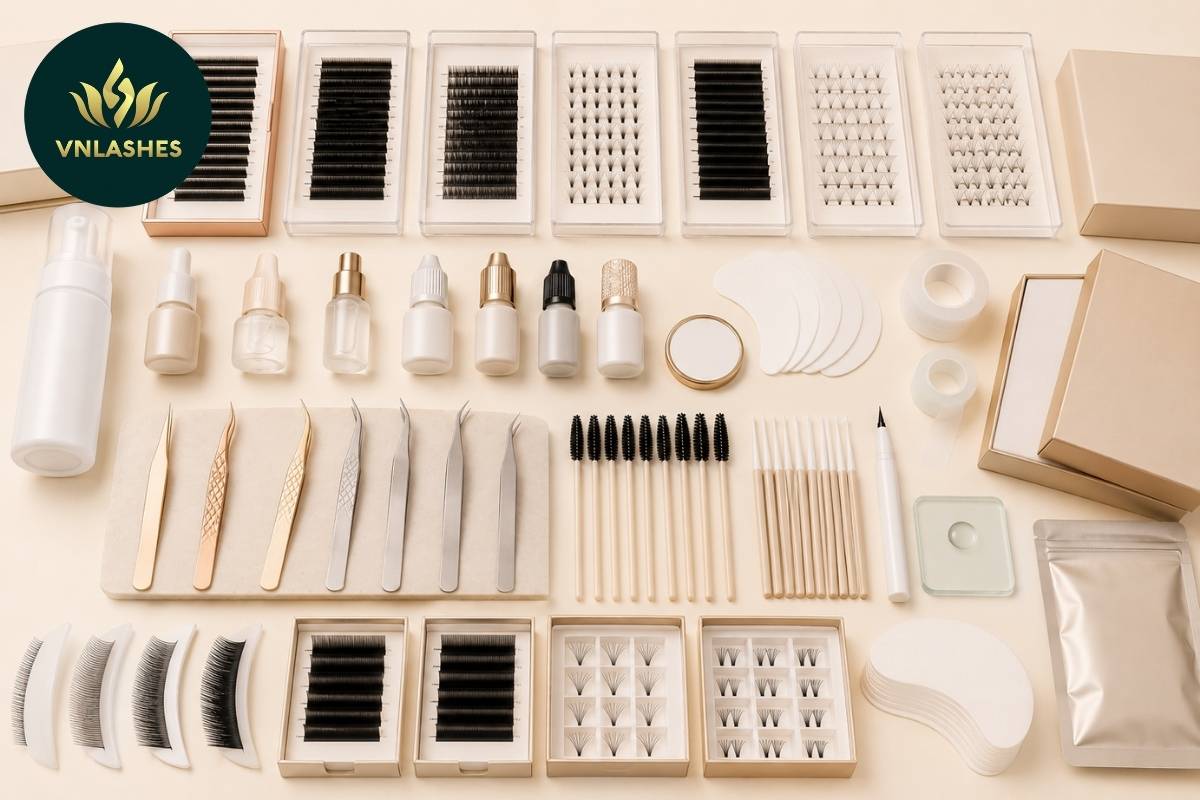
Preparing the right products before the appointment helps the artist work more efficiently and maintain consistent results.
Eyelash Extensions
The selected product should match the application technique and desired appearance. Common choices include:
- Classic lashes
- Volume lashes
- Premade fans
- Narrow premade fans
- Flat lashes
- YY lashes
- W lashes
- Colored extensions
Before use, artists should check curl consistency, fiber softness, base shape and length accuracy.
Lash Adhesive
The adhesive creates the bond between the extension and the natural lash. Its drying speed should match the artist’s working pace and the salon environment.
A glue that cures too quickly may set before correct placement. A product that dries too slowly can increase the risk of movement, stickies or uneven direction.
Preparation Tools
Important tools for eyelash extension application may include:
- Lash cleanser or shampoo
- Primer
- Under-eye pads
- Micropore tape
- Isolation tweezers
- Pickup tweezers
- Glue ring or adhesive stone
- Lash mapping pen
- Spoolie brushes
- Compatible bonder
Tools should be clean, properly maintained and organized before every service.
7 Steps in the Eyelash Extension Application Process
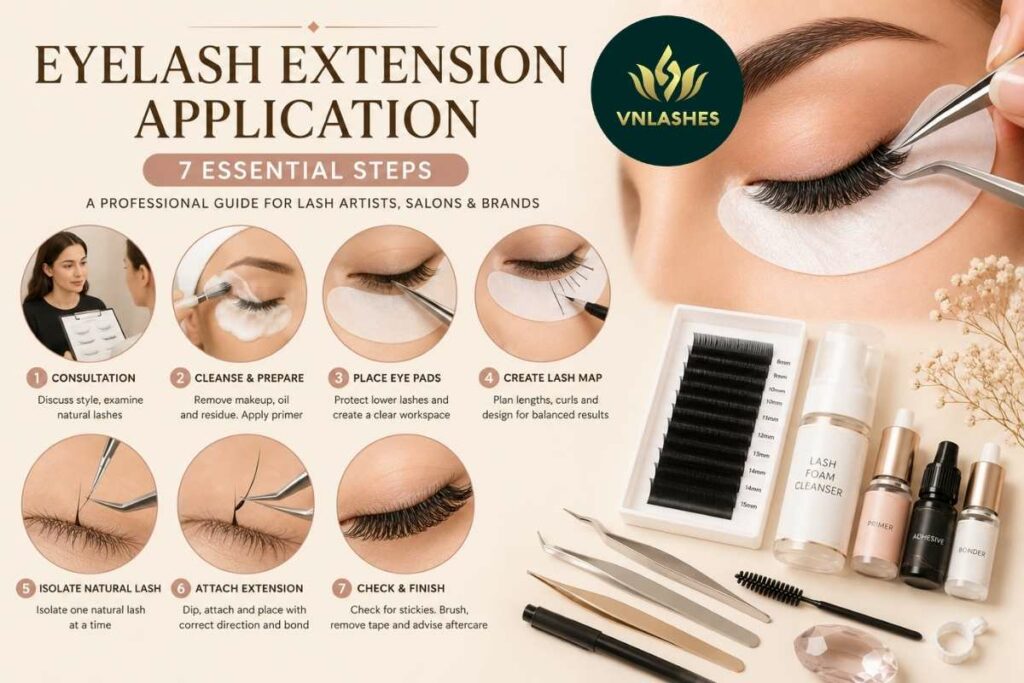
Step 1: Conduct a Client Consultation
The eyelash extension application should begin with a clear discussion about the desired style, natural lash condition and previous reactions.
Identify the Desired Style
Ask whether the client prefers:
- Natural
- Wispy
- Cat-eye
- Doll-eye
- Open-eye
- Light volume
- Full volume
The requested look should be adjusted according to eye shape, lash density and everyday needs.
Examine the Natural Lash Line
Check the strength, direction and density of the client’s lashes. Fine or weak strands may require lighter, shorter or thinner extensions.
The eye area should also be checked for visible irritation, injury or infection. When significant discomfort or an abnormal condition is present, the service should be postponed and the client should seek appropriate professional advice.
Step 2: Clean and Prepare the Lashes
A clean lash line supports stronger bonding and more consistent eyelash extension application.
Remove Makeup, Oil and Residue
Use an extension-safe cleanser to remove:
- Eye makeup
- Natural oils
- Dust
- Skincare residue
- Product buildup
After cleansing, dry the lashes completely before continuing.
Apply Primer When Appropriate
Primer may help when oil remains after cleansing. It should be used carefully because excessive application can leave the lash surface unnecessarily dry.
Clients should normally remove contact lenses before the appointment to reduce possible discomfort.
Step 3: Place the Under-Eye Pads
Eye pads protect the lower lashes and create a clear working area.
Secure the Lower Lash Line
Position the pads close to the lower lash line without touching the eye. Confirm that all lower lashes are covered.
Small exposed lashes can be secured with micropore tape.
Confirm Client Comfort
Before continuing the eyelash extension application, ask whether the pads or tape feel comfortable. Incorrect placement may cause watering, pressure or irritation during the service.
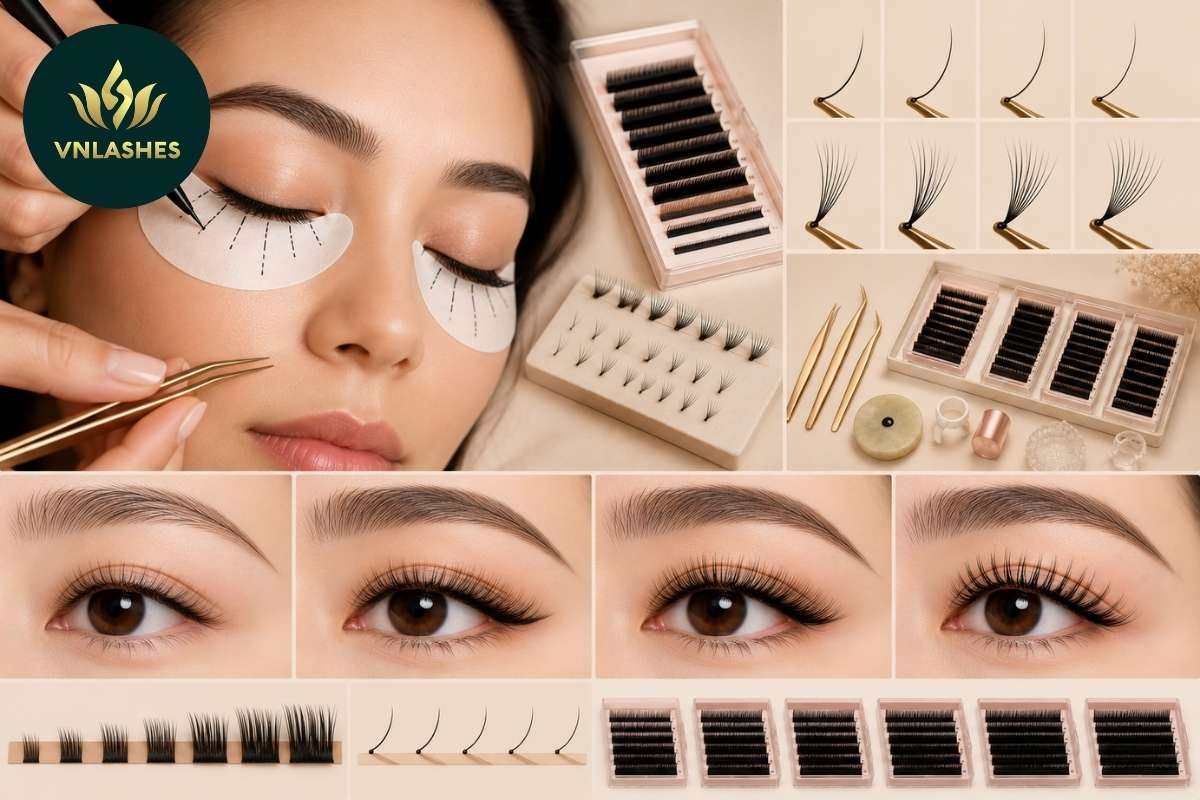
Step 4: Create a Lash Map
Lash mapping determines where different lengths, curls and shapes will be placed.
Choose Suitable Lengths
Extension length should be selected according to the strength and size of the natural lashes. Excessively long or heavy products can create an unbalanced appearance and unnecessary stress.
Select the Curl
C, CC and D curls are commonly used for lifted styles. L, LD and M curls may create a stronger base direction or an eyeliner effect.
Lengths should transition gradually across the lash line to support a balanced eyelash extension application.
Step 5: Isolate One Natural Lash
Clean isolation is essential for a comfortable and accurate result.
Separate the Target Lash
Use isolation tweezers to separate one suitable lash from the surrounding strands.
One extension or fan should be attached to one isolated natural lash. When several lashes are bonded together, they may pull against each other as they grow.
Work in Organized Sections
Artists may work from one section to another or alternate between both eyes. An organized method supports symmetry and provides time for each bond to stabilize.
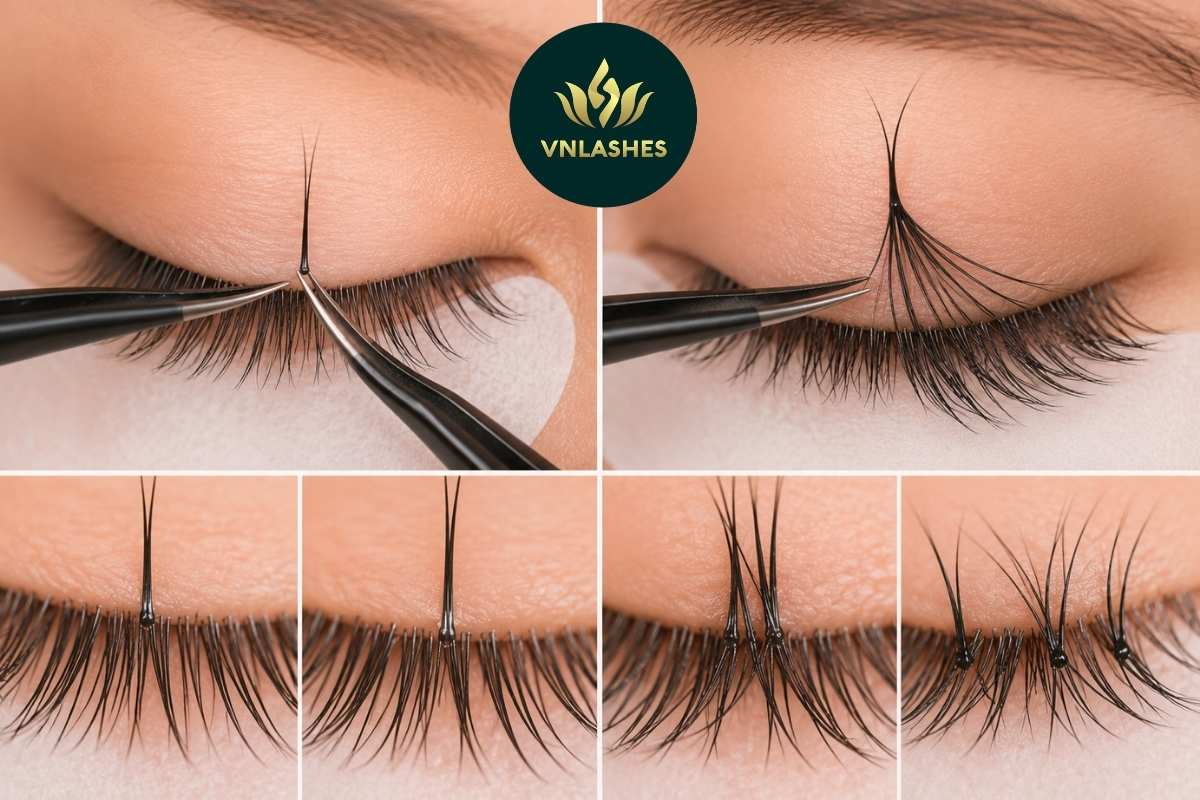
Step 6: Attach the Extension
After isolation, dip the base into the adhesive and position it on the selected natural lash.
Control the Adhesive Amount
The base should carry a small, even amount of glue.
Too much adhesive may result in:
- Bulky attachment points
- Stickies
- Slow curing
- Uneven placement
- Reduced comfort
Too little adhesive may cause:
- Weak attachment
- Limited bonding area
- Poor retention
- Premature shedding
The correct quantity depends on adhesive texture, extension base and eyelash extension application technique.
Position the Extension Correctly
Place the extension parallel to the natural lash while leaving a small, consistent distance from the eyelid.
The base should make sufficient contact with the lash without touching the skin. Side, top or bottom placement may be used when the bond remains clean and secure.
Check the Lash Direction
Adjust the direction before the adhesive sets. Consistent placement helps the completed set appear neat, even and symmetrical.
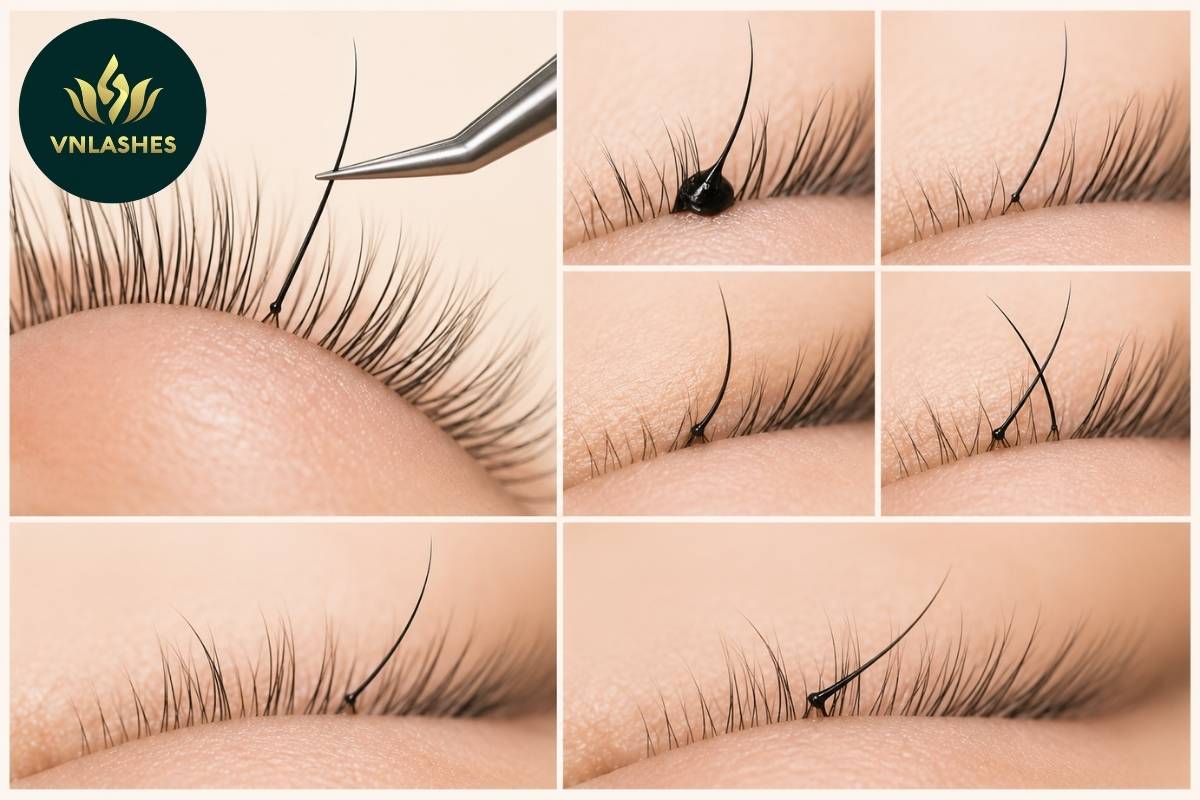
Step 7: Complete the Final Check
Before finishing the eyelash extension application, inspect the full lash line carefully.
Check for Stickies
Separate any lashes that have bonded together. Examine both the upper and lower lash lines before removing the pads.
Follow the Curing Instructions
Use the adhesive according to its manufacturer’s instructions. A compatible bonder may be applied when it is part of the selected adhesive system.
Brush and Review the Set
Gently brush the extensions with a clean spoolie and check:
- Direction
- Symmetry
- Coverage
- Attachment points
- Client comfort
Eyelash Extension Aftercare
Correct aftercare helps clients keep their lash line clean and may support better retention after eyelash extension application.
Clean the Lash Line Regularly
Recommend an oil-free cleanser formulated for extensions. Regular washing helps remove makeup, oils and debris.
Avoid Pulling or Rubbing
Pulling, rubbing or picking may loosen the extensions and place unnecessary pressure on the client’s own lashes.
Brush Gently
A clean spoolie can be used to arrange the fibers after sleeping or cleansing. Brushing should be gentle and should not pull at the attachment area.
Use Suitable Skincare Products
Some oil-rich removers and skincare products may weaken certain adhesive systems. Clients should follow the guidance provided by their lash artist and product supplier.
Schedule Refills
Natural lashes grow and shed continuously. Refill appointments replace extensions that have fallen out during the normal growth cycle.
Common Eyelash Extension Application Mistakes
Selecting Extensions That Are Too Heavy
Length and thickness should match the condition of the natural lash. A heavier product is not always suitable, even when the client requests a dramatic result.
Using Uneven Adhesive Amounts
Inconsistent glue pickup can produce different retention levels across the lash set. Controlled dipping helps create cleaner attachment points.
Incomplete Isolation
Poor isolation may cause several natural lashes to stick together, leading to pulling and discomfort during growth.
Placing the Base Too Close to the Eyelid
Extensions should not touch the skin. A small, consistent distance helps maintain comfort and natural lash movement.
Ignoring Temperature and Humidity
Environmental conditions affect adhesive performance. Artists should monitor the room and use a product designed for the working conditions.
How Product Quality Affects Eyelash Extension Application
Good technique remains essential, but consistent products can make the process easier and more efficient.
Stable Curl and Accurate Length
Uniform curls and clearly marked lengths make mapping easier and support symmetrical styling.
Clean, Lightweight Bases
Premade fans should have neat, lightweight bases. Thick or irregular bases can be more difficult to attach and may add unnecessary weight.
Smooth Removal From the Strip
Tray lashes should release without bending or damaging the base. A suitable strip also helps artists pick up fibers accurately.
Clear Product Labels
Packaging should clearly show curl, thickness, length and volume. Accurate labeling reduces mistakes during eyelash extension application.
As an eyelash manufacturer and wholesale supplier, we inspect these details during production to support salons, distributors, academies and private label brands.
Choosing Products for Wholesale or Private Label
Businesses sourcing professional lash products should evaluate more than price alone.
Important factors include:
- Fiber softness and color
- Curl stability
- Thickness accuracy
- Fan symmetry
- Base consistency
- Tray quality
- Packaging design
- Product labeling
- Customization options
- Minimum order quantity
- Production capacity
Private label businesses may also customize product specifications, logos, trays, boxes and packaging formats.

Frequently Asked Questions
How Long Does Eyelash Extension Application Take?
A full eyelash extension application commonly takes around 90 minutes to three hours. The exact duration depends on the technique, natural lash density, desired coverage and artist experience.
Can an Extension Be Applied to Every Natural Lash?
Only healthy and suitable lashes should carry an extension. Very short, weak or newly growing strands may need to remain free.
How Much Adhesive Should Be Used?
The extension base requires enough adhesive to create a secure contact area without forming a large or uneven bead.
Are Premade Fans Suitable for Eyelash Extension Application?
Yes. Well-made premade fans can help artists create volume sets efficiently. They should be lightweight, symmetrical and appropriate for the client’s natural lashes.
Why Do Extensions Fall Out Early?
Premature shedding may be related to incomplete cleansing, unsuitable adhesive, environmental conditions, limited bonding area, application technique or aftercare habits.
Conclusion
Eyelash extension application requires careful consultation, cleansing, mapping, isolation, adhesive control and final inspection. Each stage influences the appearance, comfort and durability of the finished set.
For salons, wholesalers and lash brands, product consistency is also important. Stable curls, accurate dimensions, lightweight fibers and clean bases help artists perform eyelash extension application more efficiently and maintain dependable service quality.


Bài viết liên quan
Private Label Lashes: Build Your Own Lash Brand With A Trusted Manufacturer
Building a successful business in today’s beauty industry involves more than simply selling high-quality products....
Oct
Zero Time Promade Fan Lashes – Wholesale Manufacturer & OEM Services
For lash salons and professional eyelash brands, application efficiency and consistent quality are important factors...
Oct
Magic Fan And Zero Time Promade Fan – A Faster, Time-Saving Lash Extension Solution
In the professional lash extension industry, application speed and product consistency are important factors for...
Oct
Custom Magic Fans Manufacturing and OEM Services: Production Process
When sourcing Magic Fans in bulk, buyers need more than just an attractive lash tray....
Aug
Lash Extension Removal: Common Mistakes and Safe Techniques
Lash extension removal is an important part of professional lash care. When extensions are removed...
Jul
Lash Foam Cleansers: A Practical Guide for Lash Professionals
Lash foam cleansers are essential products for cleaning natural lashes, eyelids and eyelash extensions. They...
Jul